Thursday, April 21, 2022

Validation Rules

 The default validation rules

You can find some sample validation rules

/sitecore/system/Settings/Validation Rules/Field Rules/Sample

We can duplicate the sample item for creating new one

Case 1:

I like to set the required option to my field


Case 2:

I like to set the required and maximum length of the field
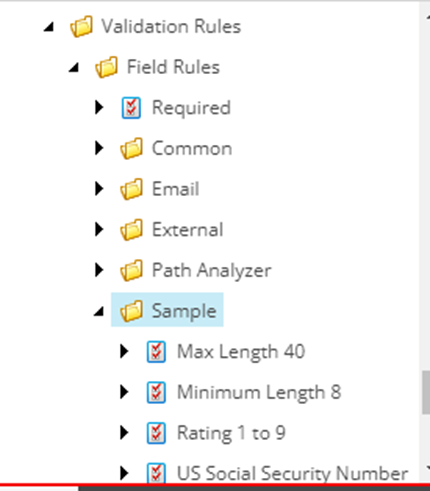
I’ll  add maximum 40 to my field
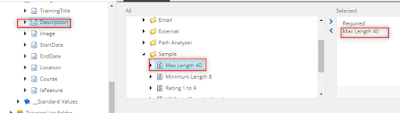
Let’s check the validation

I have given the field more than 40


But it allows me to save the page 

Case 3:

I would like to stop my user to save the page when they have errors in the item

Go to your rule path

/sitecore/system/Settings/Validation Rules/Field Rules/Sample/Max Length 40

Parameters : MaxLength=40&Result=FatalError

Let’s test

 Case 4:

I don’t like to give the error popup just like to show the warning

Parameters : MaxLength=40&Result=Warning

Case 5:

I like to show an error when the field has exceeded the length and would like to allow the user to save the item without fixing it

Parameters: MaxLength=40&Result=CriticalError


How to add the Custom validation Custom rule-Ignore past date

Validation Intro


Everyday content authors are working with Sitecore contents . As a backend developer we need to give the validation rules for all the required fields. let’s see where we need to define and how to use it?

The validation options

Ø  Validation options are available in the Validation Rules section of the data template standard values and template field definitions. Sitecore comes with a set of default validation options as described in the following table.

Ø  For demo I have updated the validation for one field in template.

Ø  Go to your template field and Validation section


Where do I set and see my validation error?

Quick Action Bar

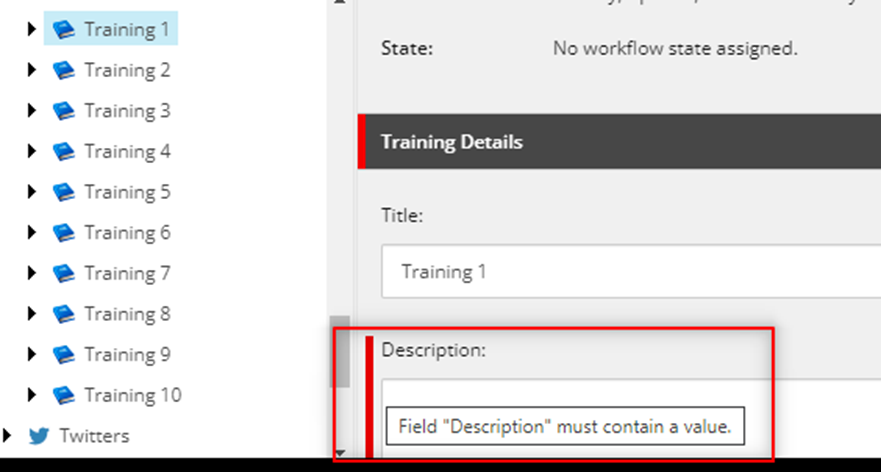
Validation issues appear in the Quick Action Bar on the left in Content Editor


Validation Button

Validation issues appear when the user chooses the Validation command from the Proofing group on the Review tab, and when the user invokes a transition to a workflow state, which includes the workflow validation action.


Validation Bar

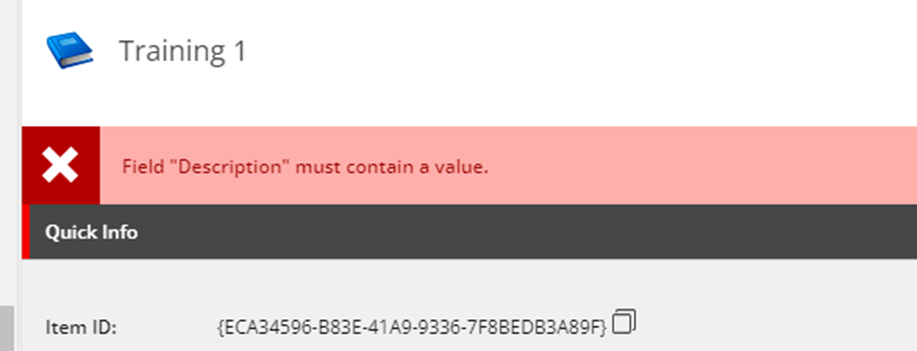
Validation issues appear in the Validation bar on the right in Content Editor


Workflow Validation Rules

Validation issues appear in the user interface when a user chooses a workflow command associated with the workflow validation action. The user cannot complete the workflow action without resolving all validation errors.


Experience Editor View

Click here to learn more about Validation Rules

Sunday, February 27, 2022

Sitecore Layout Demo


Step 1:

·         Create template and datasource folder

·         Create template folder which keeps the new template items.

Step 2:

·         Write a code for ContentResolver

public class EventsListResolver : Sitecore.LayoutService.ItemRendering.ContentsResolvers.RenderingContentsResolver

    {

        private List<Item> items = new List<Item>();


        public override object ResolveContents(Sitecore.Mvc.Presentation.Rendering rendering, IRenderingConfiguration renderingConfig)

        {

            Assert.ArgumentNotNull(rendering, nameof(rendering));

            Assert.ArgumentNotNull(renderingConfig, nameof(renderingConfig));


            Item ds = GetContextItem(rendering, renderingConfig);


            var recommendedItemsFieldId = Templates.EventRenderingModel.TemplateId;


            //if the rendering datasource has curated items

            if (ds != null)

            {

                foreach (Sitecore.Data.Items.Item childItem in ds.Children)

                {

                    items.Add(childItem);

                }

            }


            if (!items.Any())

                return null;


            JObject jobject = new JObject()

            {

                ["items"] = (JToken)new JArray()

            };


            List<Item> objList = items != null ? items.ToList() : null;

            if (objList == null || objList.Count == 0)

                return jobject;

            jobject["items"] = ProcessItems(objList, rendering, renderingConfig);

            return jobject;

        }


        private string GetItemUrl(Item item)

        {

            return Sitecore.Links.LinkManager.GetItemUrl(item);

        }

    }


Step 3:

·         Create Content Resolver in Sitecore


Step 4:

·         create new rendering in Sitecore JSS


Step 5:

·         Add rendering to the page


Step 6:

·         Check the layout service result

https://sc102sc.dev.local/sitecore/api/layout/render/jss?item={49D28007-AFAF-49A7-B6AE-08E05FBAEB76}&sc_apikey={81E7F129-B5DA-4EC7-8C85-C5B2FE3FA3A1}

Before

After

Step 7:

·           Check the page in your site.


Step 8:

·         Create new component in JSS app


·         This is Sitecore definition item


·         Now I added the fields which are available in templates,

·         This is components definition item.


·         We have to loop all the event list here by help of react team.

Sitecore First Workflow


Creating Renderings

·         When creating rendering items, use the Json Rendering template instead of View renderings, controller rendering, etc. This rendering template is automatically rendered to JSON when emitted via Layout Service.

·         Also unique to Json Rendering, the Component Name field is a string that needs to match up to the name of a component registered in the JSS app.

·         For example, if you created a rendering with Sitecoreshades as the component name, the JSS app would need a Sitecoreshades.js component that was registered with its component mapping as " Sitecoreshades " -> Sitecoreshades.js.

·         If a component name cannot be mapped, JSS apps will show a placeholder with the name of the missing component received from Sitecore. This can be used to scaffold out a component hierarchy prior to frontend developers actually implementing the view of the components.

Special Notes

·         If you add a placeholder to a rendering, don't forget to add it to the Layout Service Placeholders field on the rendering item .

·         if this is not done, Layout Service will not attempt to render the child placeholder, and you will not receive any renderings added to it in the Layout Service data.

Editing & Creating Routes

Creating routes Sitecore-first is just like adding pages in a traditional Sitecore site.

Scripted component scaffolding in Sitecore-first

When working in a Sitecore-first application, the task of adding a new component involves a repetitive set of steps (creating a rendering item, datasource template item, datasource location folders, linking them together, etc). To keep this simple, there are JSS CLI commands to help scaffold JSS components' Sitecore infrastructure:

·         jss deploy component deploys a new component (similar to manifest.addComponent() for code-first, but directly to the Sitecore database)

·         jss deploy template deploys a new Sitecore template (for use as a content template, settings item, etc)

Run jss deploy component --help for documentation; a usage can be as simple as jss deploy component HelloWorld --allowedPlaceholders content.

Transitioning from Code-first to Sitecore-first

The JSS sample apps are all set up to use code-first workflow by default. At some point, apps may wish to transition from working with disconnected data and importing that into Sitecore to treating Sitecore data as the master.

Such a transition would usually be because:

·         An app started its life as a code-first disconnected prototype and is transitioning to be Sitecore integrated

·         App developers are more comfortable working in Sitecore than in JS and prefer a familiar backend

Removing Code-First Artifacts

These instructions apply to all supported JS libraries.

Extensively customized apps using different techniques than the standard sample apps may require additional steps depending on their customizations.

·         Delete /data to remove disconnected route data, if it exists

·         Delete /sitecore/definitions to remove the manifest definitions

·         Delete /sitecore/pipelines (if it exists) to remove manifest pipeline patches

·         Delete /scripts/disconnected-mode-proxy.js to remove an unused script

·         In the package.json:

ü  Remove the start script, and (optional) rename start:connected to start to remove the option to start disconnected

ü  Remove the bootstrap:disconnected script

Working After Removal

Once code-first has been removed from the app, you may continue development as before but without expecting any new items to come from the JSS app.

Let's have a look Sitecore Layout Demo

Steps to follow when using a PowerShell script to modify the goals in Sitecore

I have previously utilized PowerShell for item creation, modification, deletion, and presentation details in Sitecore.   Ø Recently, I attem...