Monday, June 27, 2022

Implement conditional display fields


Implement required fields on an entity definition and configure validations

Use case:

Make field as required

ØLet’s add one new field with validation in M.Asset entity definition

ØEdit

ØI have updated the required condition here.

ØLet’s test in Asset detail page


ØHere I could see the required field with message, it is in white color, so couldn’t see the error message here

ØWhen I try to save the page without filling required type

Conditional

ØYou can set conditions to only display the relation member on the entity when they are met.

Use case:

 I have two meta data geography,options list. My client asks me to do the validation when we select africa in geography that time only we need to allow the user to select the option list. How should I do that?


ØEdit the Demo.OptionList


ØLet’s test in Asset detail page

ØLet me remove the geography and then test

ØThat section will be disappear automatically.

Import option lists using Excel

 You can import option lists using Excel. A single Excel file can hold several option lists.

Notes

The name of the Excel file must be OptionLists, with no space between Option and Lists.

At a minimum, the Excel spreadsheet must contain the following columns:

ØName

ØIdentifier

ØLabel

ØPlease find the sample sheet here,


Ø Where should upload the sheet?

To create a page or subpage:

ØOn the menu bar, click Manage . 

ØOn the Manage page, click Pages.

In the Pages portal, do one of the following:

ØTo create a page, click + Page.

ØTo create a subpage, in the list of pages, click More actions  and select + Add subpage.

ØIn the Page dialog box, in the Name field, enter a name for the page or subpage.

ØFrom the Page type list, select Blank page.

ØFrom the Master layout list, select the layout you want to use.

ØClick Add.

ØOn the page or subpage, in the Main Zone, click Add component  and, in the Add component dialog box, select the Creation component.

ØClick Add Icon


ØEnter a name for the new component and turn the Visible switch to On.

ØClick Add.

To modify the Creation component:

ØOn the page or subpage, on the Creation component, click More actions  and select Edit.

ØOn the Creation component detail page, turn the Upload files switch to On.

ØTurn the Import Excel switch to On.

ØClick Save and close.

ØTo view the page or subpage, on the Layout tab, click View Page.

ØIn the page preview, click + Add and select Import Excel.


To verify that the option lists was imported successfully:

ØOn the Manage page, click Option lists.

ØSearch for the imported file and select it. 

ØBut I couldn’t find my optionlist, let me check my background process


ØThen I changed my sheet name Sheet1 to OptionLists.


ØClick the option list to open it and verify that the import was successful.

Create new option lists and extend entity definitions (such as M.Asset, etc.) to include them


Option lists

ØIn Sitecore Content Hub™, an entity is defined by its properties and relations. Entity property types include string, boolean, integer, and so on.

ØAn entity property can also be an option list, which is a limited list of possible values for a property.

ØWith an option list, the hierarchical structure is defined in the data whereas with a taxonomy the data is associated with a hierarchical structure. This means that using an option list results in a smaller, less complex dataset, quicker loading times, and better performance because the graph does not need to load extra information (such as relations).

NOTE

You can only delete an option list when it is not used within the domain model.

To create an option list:

 ØOn the menu bar, click Manage 

ØOn the Manage page, click Option lists.

ØOn the Option lists page, click + Option list.


OptionList Page


In the Option list dialog box, select the type of option list you want to create:

Hierarchical: creates an option list where you can build a hiearchical structure of items.

Flat: creates a flat option list with all items at the same level.so it won’t have the structured level.

ØCreate a new Option list

ØChoose the type


ØAdd items in the option list


ØThe same way we need to follow for creating item for Flat list.

ØAdd this list with any of the scheme


ØOnce you clicked the New member the popup will come


ØGo to the asset page

ØGo to the added Option list


ØAfter selecting the values in Option list

Implement security on properties


Configure member security

Member security enables specific security settings regarding entity definition member groups and members. Read and Write permissions can be assigned to Secured entity definition members:

ØRead - the user group can view the member groups and members of the entities in the entity definition.

ØWrite - the user group can update the values of the member groups and members of the entities in the entity definition.

Notes

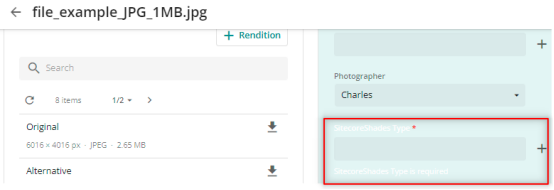
If a taxonomy relation has no values, all users are given the Write permission, regardless of their user groups. To prevent this, the taxonomy relation must be mandatory as defined in the user group policies.

Secure a member definition

ØMember security only includes Secured entity definition members.

 To secure an entity definition member:

ØOn the menu bar, click Manage .

ØOn the Manage page, click Entities.

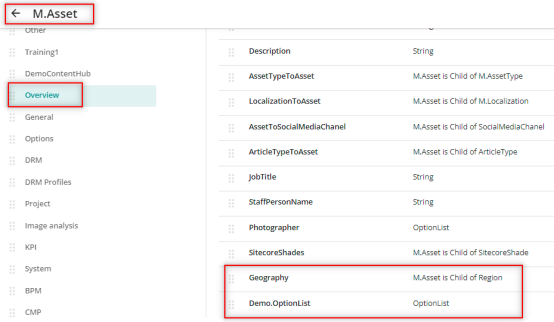
ØOn the Entities page, find the required entity definition, for example M.Asset.

ØOn the entity definition page, click Actions , and select Edit.

ØFind the required member, for example, the Brand member in the General member group of M.Asset.


ØNext to the member, click Actions , and select Edit.

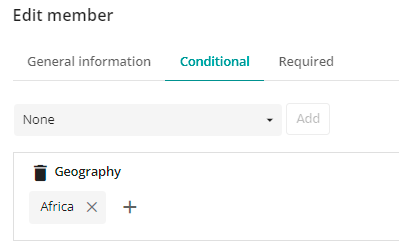
ØIn the Edit member dialog box, click the Advanced tab.

Notes:

ØIn this example, Brand is a taxonomy member, so settings are on the Advanced tab. For a string member, settings are on the General information tab.

ØOn the Advanced tab, turn on the Secured switch to make it active, and then click Save.

On the Demo page, click Publish.

Configure a member definition

Secured members are displayed on the Member security tab. 

To configure a member definition:

ØOn the menu bar, click Manage manage icon.

ØOn the Manage page, click Users.

ØOn the Users page, click the User groups tab.

ØFor the relevant user group, click Policies Wheel icon.

ØOn the User group policies page, click the Member security tab.

ØUnder Definitions, select the required definition, for example M.Asset.

Øelect the required Member groups, for example General.

ØSelect the required permissions for each member, for example Read and Write for the Brand member.

ØClick Save.

Steps to follow when using a PowerShell script to modify the goals in Sitecore

I have previously utilized PowerShell for item creation, modification, deletion, and presentation details in Sitecore.   Ø Recently, I attem...