Sunday, January 2, 2022

Sitecore JSS Series


Hai JSS Learner,

When I Started to learn about JSS, I thought that might be difficult to learn and I have taken more than two days to set up a simple JSS app, after resolving everything I got to know about my small mistakes on it. I liked to write a blog about my experience in Sitecore JSS and From my learning, I learned that JSS is a  very simple and easily understand a thing.

What is JSS ?

Create your JSS APP

JSS APP Structure

Connect your app with Sitecore

Create Banner in JSS

Setup JSS with Sitecore SXA

Design a Layout in JSS

Happy Sitecoring!!!!

Master Layout

 We can see the placeholders in layout section in sitecore. The same we can do in jss app.

Let me demonstrate the placeholder adding here

Step 1:

Add new placeholders in Layout page


<div className="container">

      <Placeholder name="jss-header" rendering={route} />

    </div>

    <div className="container">

      <Placeholder name="jss-main" rendering={route} />

    </div>

    <div className="container">

      <Placeholder name="jss-main-two" rendering={route} />

    </div>

    <div className="container">

      <Placeholder name="jss-footer" rendering={route} />

    </div>

Step 2:

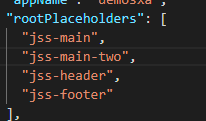
Add placeholders with display name


 { name: 'jss-main', displayName: 'Main' },

    { name: 'jss-main-tow', displayName: 'Main-Two' },

    { name: 'jss-header', displayName: 'Header' },

    { name: 'jss-footer', displayName: 'Footer' },

Step 3:


Step 4:

Deploy changes to sitecore instance


Open the page in experience editor,


I can see four placeholders here.

Step 4:

Going to create new partial view


Setup JSS with sitecore SXA


Step 1:

Create a JSS app

Ø  Run this command

jss create demosxa react


cd demosxa

jss setup


Path to the Sitecore folder - C:\inetpub\wwwroot\SC102sc.dev.local

Sitecore hostname - https://sc102sc.dev.local/

Sitecore import service URL – click enter

Sitecore API Key – key from /sitecore/system/Settings/Services/API Keys/demosxa

Please enter your deployment secret – click enter

Step 2:

Setup your Sitecore


Ø  Go to your new app


Ø  Now, we can move our jss changes to sitecore backend

Step 2:

Deploy your JSS app to Sitecore

Ø  Run this command

jss deploy app --acceptCertificate FD:12:F0:2E:42:C5:48:F3:58:39:03:27:F7:CF:45:DC:AF:DB:72:91 -c –d

Ohhh, getting error


IMPORT ERROR(S) OCCURRED!

Exception thrown while importing JSS app

Exception: System.UnauthorizedAccessException

Message: The current user does not have write access to this item. User: sitecore\JssImport, Item: ContentBlock ({66862766-846A-58DB-A639-B43C7FD76DEB})

Source: Sitecore.Kernel

Resolving the issue

Ø  Go to user manager


Ø  Save the user

Ø  Import is done.

Step 3:

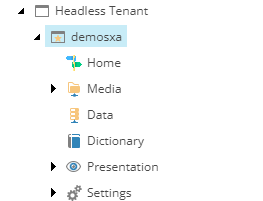
Verify the changes in Sitecore

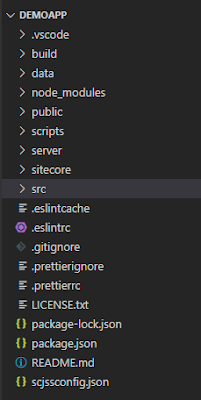
JSS APP Structure


How should I modify the above page?


Ø  The page is loading from this file


Ø  We have to add our new component here.

Ø  open new terminal in your visual studio code and run this command

jss scaffold Myfirstcomponent

Ø  We can see the our new component files in three sections.

Declaring fields

Ø  We can see the fields couple of fields here


Defining field values


Arrange the html with fields


Ø  You can see the html structure here and we can update it.

Special note:

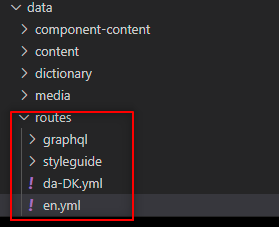
Component name is case sensitive. We should use the same name in en.yml file.


Ø  Refresh your localhost for verifying changes

I like to create more pages here, what should I do?


Ø  you can add your new placeholder here,


Create Banner in JSS app

Step 1:

Ø  Creating a Banner component

Ø  Run this command

  jss scaffold Banner


Step 2:

Defining the fields


fields: [

      { name: 'title', type: CommonFieldTypes.SingleLineText },

      { name: 'description', type: CommonFieldTypes.SingleLineText },

      { name: 'ctaurl', type: CommonFieldTypes.SingleLineText }

  ]


Step 3:

Design the HTML structure


    <h1>Hey, This is my SitecoreShades Banner</h1>

    <Text tag="h2" className="display-4" field={fields.title} />

    <Text tag="p" className="display-4" field={fields.description} />

    <Text tag="a" className="display-4" field={fields.ctaurl} />

  </div>

Step 4:

Add the component with field values in page


Step 5:

Ø  Output

Step 6:

Ø  Deploy the changes to my sitecore instance

Ø  Run this command


jss deploy app --acceptCertificate FD:12:F0:2E:42:C5:48:F3:58:39:03:27:F7:CF:45:DC:AF:DB:72:91 -c –d

Ø  See your sitecore url

Step 7:

Verify the changes in sitecore content editor.


Step 8:

let me check the page in experience editor & We can edit the page here


So we can remove the components from here.

Steps to follow when using a PowerShell script to modify the goals in Sitecore

I have previously utilized PowerShell for item creation, modification, deletion, and presentation details in Sitecore.   Ø Recently, I attem...